使用Flask实现一个RESTful API Server
更新
本文介绍的实现方法略麻烦,更简单的方法请参照:使用Flask实现一个RESTful API Server
REST的六个特性
- Client-Server:服务器端与客户端分离。
- Stateless(无状态):每次客户端请求必需包含完整的信息,换句话说,每一次请求都是独立的。
- Cacheable(可缓存):服务器端必需指定哪些请求是可以缓存的。
- Layered System(分层结构):服务器端与客户端通讯必需标准化,服务器的变更并不会影响客户端。
- Uniform Interface(统一接口):客户端与服务器端的通讯方法必需是统一的。
- Code on demand(按需执行代码):服务器端可以在上下文中执行代码或者脚本。
RESTful web service的样子
REST架构就是为了HTTP协议设计的。RESTful web services的核心概念是管理资源。资源是由URIs来表示,客户端使用HTTP当中的POST, OPTIONS, GET, PUT, DELETE等方法发送请求到服务器,改变相应的资源状态。
HTTP请求方法通常也十分合适去描述操作资源的动作:
| HTTP方法 | 动作 | 例子 |
|---|---|---|
| GET | 获取资源信息 | http://example.com/api/orders (检索订单清单) |
| GET | 获取资源信息 | http://example.com/api/orders/123 (检索订单 #123) |
| POST | 创建一个次的资源 | http://example.com/api/orders (使用带数据的请求,创建一个新的订单) |
| PUT | 更新一个资源 | http://example.com/api/orders/123 (使用带数据的请求,更新#123订单) |
| DELETE | 删除一个资源 | http://example.com/api/orders/123 (删除订单#123) |
REST请求并不需要特定的数据格式,通常使用JSON作为请求体,或者URL的查询参数的一部份。
设计一个简单的web service
对于我的监控项目,四种请求都要用到,首先设定URL
1 | http://[hostname]/monitor/api/v1.0 |
上面的URL包括了应用程序的名称、API版本,既提供了命名空间的划分,同时又与其它系统区分开来。版本号在升级新特性时十分有用,当一个新功能特性增加在新版本下面时,并不影响旧版本。
第二步,规划资源的URL
| HTTP方法 | URL | 动作 |
|---|---|---|
| GET | http://[hostname]/monitor/api/v1.0/piclist/ | 获取图片信息列表 |
| GET | http://[hostname]/monitor/api/v1.0/piclist/[picid] | 获取具体一张图片信息 |
| PUT | http://[hostname]/monitor/api/v1.0/piclist/[picid] | 更新图片信息 |
| DELETE | http://[hostname]/monitor/api/v1.0/piclist/[picid] | 删除一个图片 |
| GET | http://[hostname]/monitor/api/v1.0/user/ | 获取用户列表 |
| GET | http://[hostname]/monitor/api/v1.0/user/[userid] | 获取具体用户信息 |
| POST | http://[hostname]/monitor/api/v1.0/user/ | 增加用户 |
| PUT | http://[hostname]/monitor/api/v1.0/user/[userid] | 更新已存在用户信息 |
| DELETE | http://[hostname]/monitor/api/v1.0/user/[userid] | 删除一个用户 |
照片信息包括:
- id:唯一标示,整形。
- picname:照片文件名字,字符串。
- time:照片拍摄时间,字符串。
- status:状态(1:正常,2:可疑),整形。
用户信息包括:
- id:唯一标示,整形。
- username:用户名,字符串。
- password:密码,字符串(加密算法暂不考虑)。
- email:邮箱,字符串。
Flask简介
Flask是一个使用 Python 编写的轻量级 Web 应用框架。其 WSGI 工具箱采用 Werkzeug ,模板引擎则使用 Jinja2 。
最主要特性是简单好用,也试过Django和web.py,但感觉都没有Flask用着顺心。
1 | from flask import Flask |
配置Flask和Flask-SQLAlchemy
1 |
|
首先我们从flask导入Flask类和request类。request类用途为辨别HTTP请求类型。
然后再导入flask-SQLAlchemy类
从数据库模块导入数据库主类db及我们定义的Piclist,User类。注:由于我们的数据库已经配置并创建好,所以在这直接导入即可,具体数据库创建配置请参考:使用Flask-SQLAlchemy管理数据库
通过app.run来运行服务器,我们把debug改为True,这样出错时就能看到详细报告。由于我实在树莓派板子上运行,所以需要设置
host='0.0.0.0',不然只能从本机(树莓派)访问。
设置URL
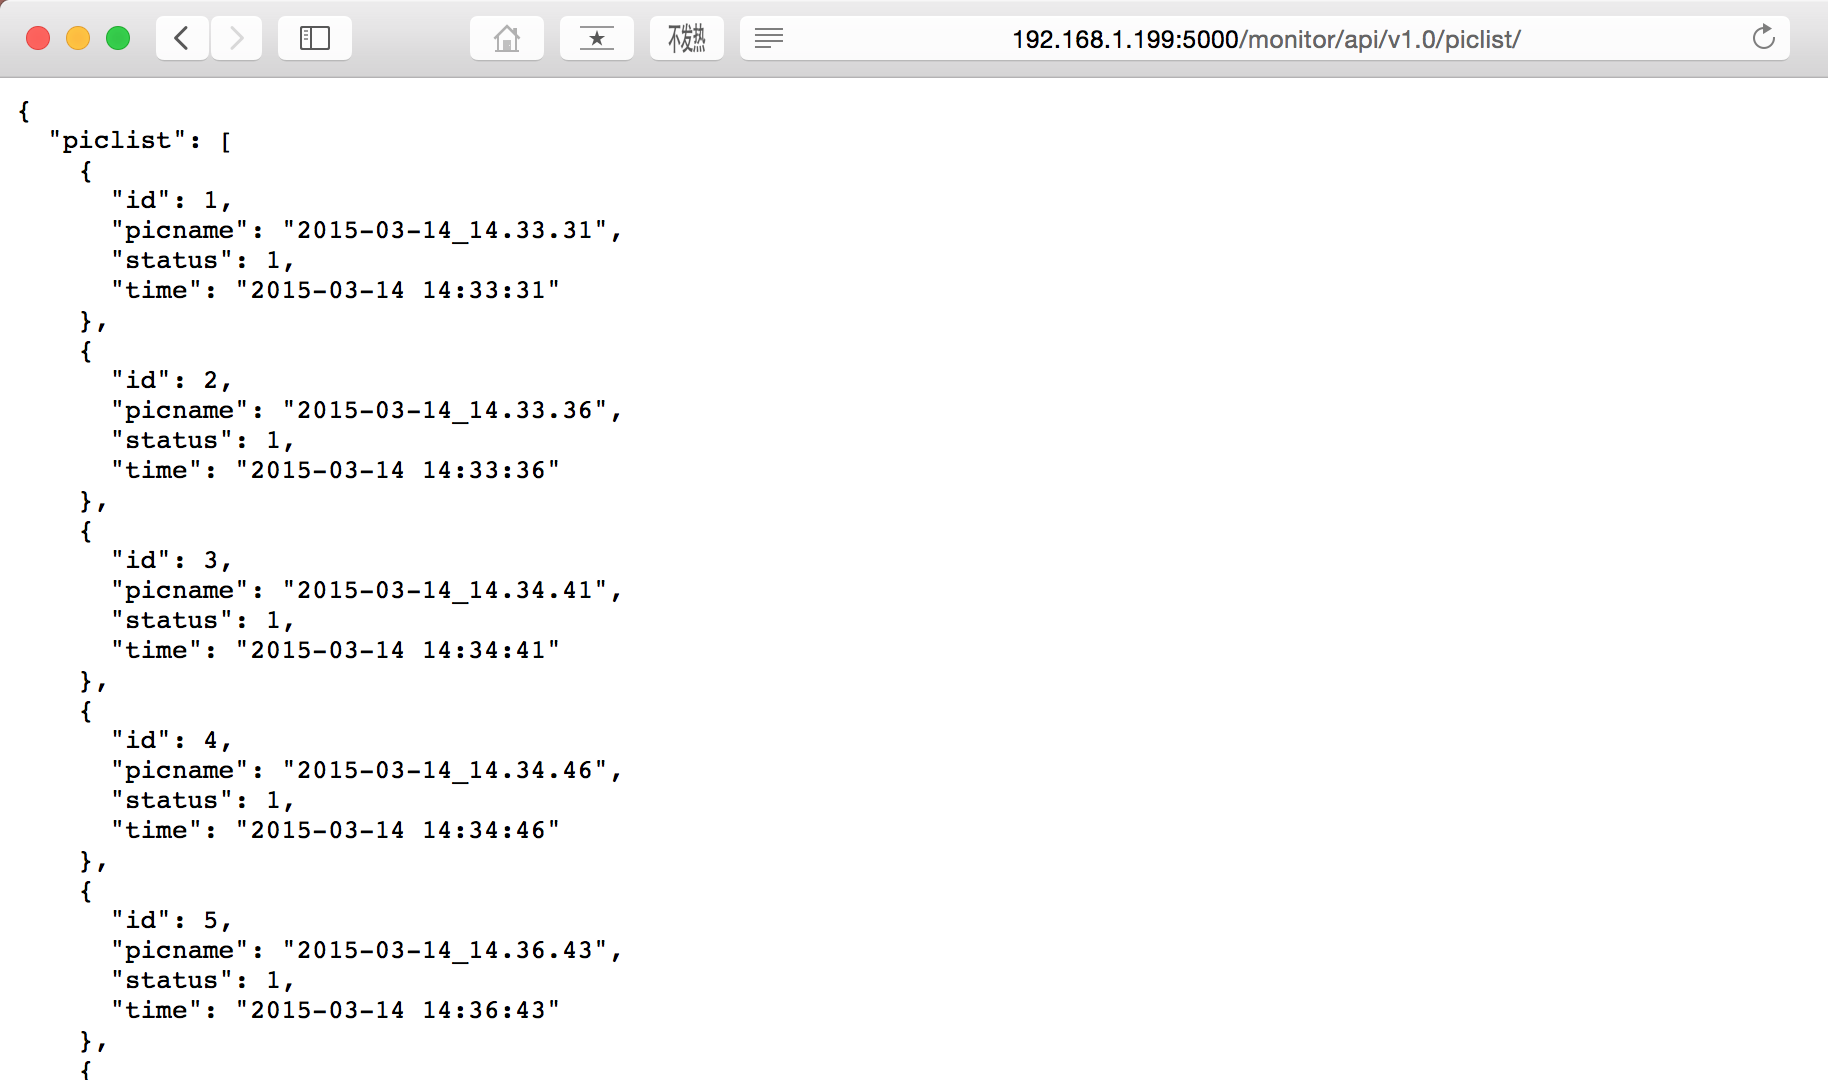
根据API列表,我们需要http://[hostname]/monitor/api/v1.0/piclist/及http://[hostname]/monitor/api/v1.0/user/两个URL,我们先从piclist开始。
1 |
|
是时候看看效果了,通过命令行运行api.py
1 |
|
用浏览器打开http://localhost:5000/monitor/api/v1.0/user/即可看到效果。注:由于我是运行在树莓派上,所以localhost替换为树莓派ip。
接下来我们处理http://[hostname]/monitor/api/v1.0/piclist/<picid>
1 |
|
Flask能够获取URL中的变量,格式为/url/<variable_name>。获取图片id后我们边通过下面的函数查询具体的图片信息。
其中查询语句相当于SQL语句SELECT -from sightings WHERE id=1;
我们还可以通过/url/?limit=20
来给piclists()函数传递变量,使用方法为
1 | @app.route('/monitor/api/v1.0/piclist/', methods=['GET']) |
然后我们可以通过http://localhost/api/v1.0/piclist/?limit=3&offset=5 来获取从第五个元素开始(不包含)的三个元素信息。
说明
本文参考:
根据自己需要适当进行修改,大部分内容来自对上述文章的翻译。未经作者允许。
还有一些高级用途因时间原因未能翻译,若感兴趣请查看原博。